I'm making bánh mì sandwiches tonight and I know it's kind of a pain, but I wanted to try and make the requisite baguettes on my own. I knew I had the ingredients for bread on hand, so in essence it would also be "free".
Turns out there's a lot of history and debate on teh internets about said Vietnamese baguettes as the ones you've had while visiting Vietnam likely weren't even baked by the proprietors of the bánh mì stands you're buying from, but are commonly bought from bakers, as the raw ingredients for bread are scarce and expensive.
I found a number of recipes that looked good, but in the end I went with Andrea Nguyen's recipe that seems to be pretty definitive regardless of the debate whether of not to include rice/rice flour in the mix.
Her post gives a lot of the "whys" the recipe is the way it is, so I'm not going to get into the specifics here.
I have never "baked" bread before. I've made a number of "dough based recipes" from naan to tortillas to pastas. I've just never baked a loaf of bread, so I felt like it was time.
The recipe is really easy, and honestly took very little effort/attention. It took about 2-3 hours TOTAL, but c'mon, that's hardly a huge investment for fresh bread. I know I made some mistakes and there are probably a thousand and one tricks I missed, but I suppose that's the fun in baking bread in the first place.
I followed her recipe verbatim, though I don't have a French bread pan, so I didn't use one. I found a comment that mentioned folding parchment in some fashion, but I pretty much just used parchment and a flat pan.
Vietnamese Baguette Recipe
1 (1/4 ounce) package active dry yeast (I used Fleishmann's)
1/2 plus 1 cup warm water (105-115°F)
3 1/2 cups AP flour, plus extra for shaping the loaves
1 1/2 teaspoons sea salt
1 tablespoon sugar
That's it!
==
Empty the yeast packet into a small bowl.
Add the 1/2 cup warm water (I used my tap water, filtered at about 110F) and sugar. Give it a stir.
Toss the salt and flour into your food processor. (You can use a stand mixer for this, and frankly, I will next time.)
Add the cup of water to the yeast. Give it another stir.
Start the food processor up and slowly drizzle in the yeast mixture through the top.
It only took me a matter of seconds once the liquid was in for the dough to ball up on the side.
I just scraped it down and covered it up for 1 hour.
 |
| 1st rise |
After the 1st hour, I punched down the dough and re-scraped the sides and let it go for 35 minutes until it doubled in size.
 |
| 2nd Rise |
The 2nd punch down/scrape:
35 more minutes for rise 3.
 |
| 3rd Rise |
 |
| 3rd punch down |
Turn out the dough (mind the dough blade) onto a floured surface.
Get it covered in flour so it's not so sticky.
Split the dough in half. Yes, I used a scale.
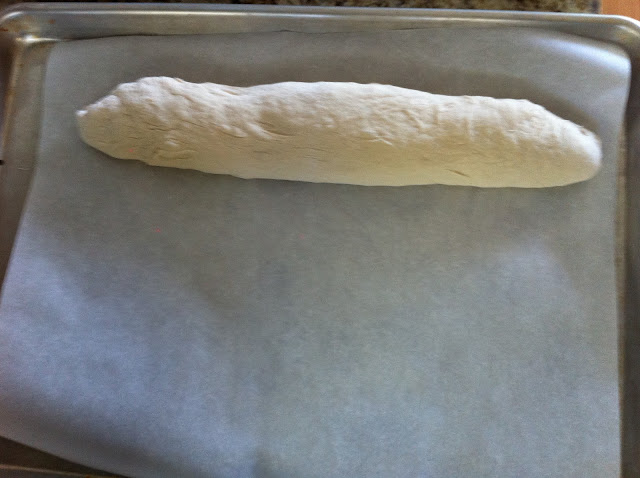
The goal here is to make a rectangle or a football shape. I couldn't get it more than this amoeba shape. She mentions that you will see the "grain" of the bread. The way it naturally wants to stretch, and I believe it's pretty easy to see. You want it going horizontally.
Fold over the top 1/3 of the dough. Try to seal this tightly with your fingers.
Then fold up the bottom 1/3. Like a letter.
I found that pinching the seam helped seal it.
Roll it out as best you can until you get a 15" loaf. I stopped a few inches short and next time I will make sure to hit that 15" mark. The final loaves were a little fat.
Repeat the above for the 2nd loaf.
These need to double in size, about 30 minutes. Cover them with a towel and let that happen on the counter.
Meanwhile, get a shallow pan and fill it with water and place it on the bottom of your oven (last rack if electric). Place the top rack on the 3rd from the top position (this is one high, I lowered it later)
Preheat your oven to 450F. Let it sit at temp until your loaves are ready to bake.
Slit the loaves with a razor blade or very thin, sharp knife. I used a razor blade. Make the cuts 1/4"-1/2" deep. I think i did too many, but it worked out fine for me.
Spritz the loaves with water before putting them in the oven.
Cook the bread for 3 minutes, then spritz them 4-6 times. Let them cook 3 more minutes then spritz one more time.
Let them cook an additional 14 minutes undisturbed.
If your oven cooks unevenly, rotate them with 5 minutes to spare.
Put them on a rack to cool for about 30 minutes before cutting into them.
==
I think that having a proper pan would give me better browning all around the loaves as the sides weren't perfectly crisp. Also, the crumb wasn't fantastic, but I think my yeast was really old.
All in all, the bread tasted really good. Soft on the inside and crispy on the out. I'm very happy with how they ended up.
While this recipe was written specifically for bánh mì, I think you can enjoy this bread with any sandwich fixin's and be very happy.
Enjoy!


No comments:
Post a Comment